Custom actions in every widget
1640170489803
Here at Gorgias, we intend on making sure every interaction with a customer can be resolved directly from a ticket. In order to do so, we offer many integrations but we realized that sometimes you have to interact with services in ways that we can’t anticipate 🤷
To ease these interactions and keep you focused on what matters, we are happy to announce that you now have to ability to customize widgets even further.
With custom action buttons & links, you can seamlessly interact with other services or navigate to a webpage with just a simple click.
What is it exactly?
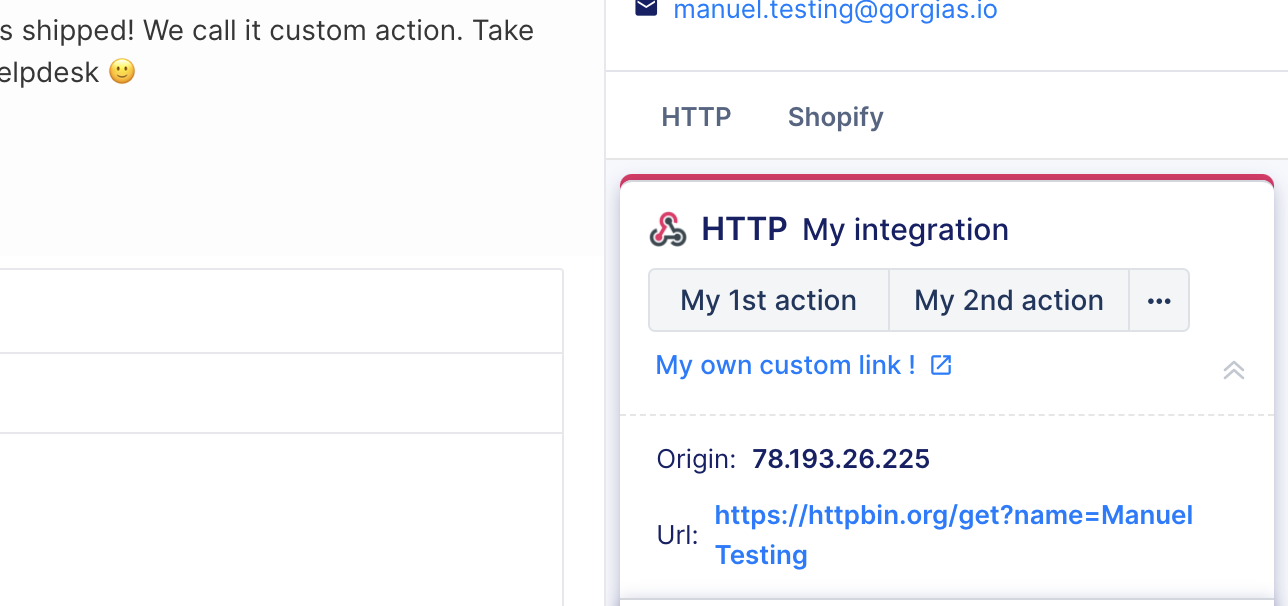
Custom actions appear below the title of a widget card. They are buttons which, on click, will run predefined HTTP calls. But you can also define more basic redirection links.
How do I define them?
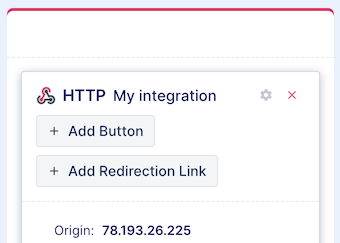
It is very straightforward! Enter the edit mode of your widgets by clicking on the cog in the top right corner and you will see two new buttons: “Add Button“ and “Add Redirection Link“
Redirection links
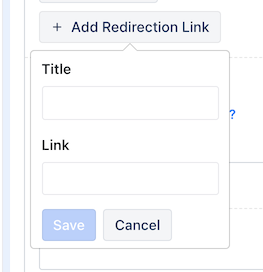
By clicking on “Add Redirection Link”, you will be prompted a tooltip asking to provide a title and a link. Enter a title and its associated link and click “Save”.
Action buttons
By clicking on “Add Button”, you will be prompted a modal asking you to configure an HTTP call. You can set as many headers and parameters as you want. We allow 4 HTTP methods: GET, PUT, POST, and DELETE. With PUT and POST methods you can also choose the content type you want and set the body’s value. Once you are done, click “Save”
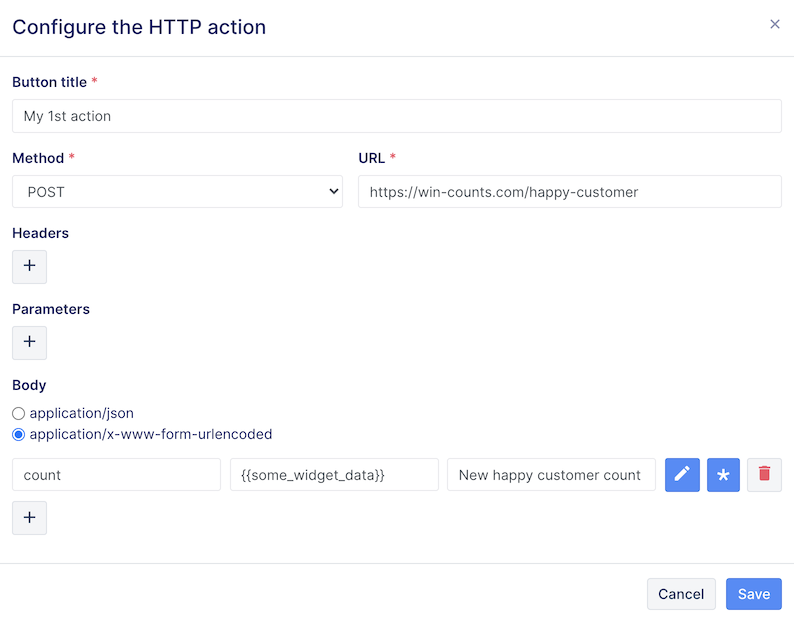
You may have noticed the pen and the asterisk button:
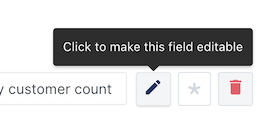
This is because once an action is set, when clicking on it, you can still edit its editable fields before executing the action. So the pen button makes the field editable and the asterisk button enforces the value to be defined before executing the action.
Templating mechanism
You also may have noticed the “{{value}}” syntax. It is the same templating mechanism you may be familiar with that is used in several other places of the help desk. The values that you have at your disposal are the one described here (when in a ticket context): https://developers.gorgias.com/reference/the-ticket-object or here (when in a customer context): https://developers.gorgias.com/reference/the-user-object. Moreover, whatever context you are in, ticket or customer, you can also access the widget data. In edit mode, the widget data are the fields displayed at the left of the widget panel.
Finally, last but not least, once you are done, don’t forget to click on the “Save changes” button at the bottom of the widget panel before exiting the edit mode, otherwise you will lose all your changes!
How do I use them?
This is the easiest part!
Concerning the custom redirection link, simply click on its title and a new tab will open at the address you provided previously in the link field.
Concerning the custom action button, when clicking on it, you will be optionally prompted to edit some fields if you decided so:

The red asterisk is a reminder that the field is mandatory and thus cannot be left empty.
Wether you decided to have editable fields or not, a notification will appear at the top of you screen once the action started:

The result can be either a success or a failure, that will also be indicated with in a notification:


And don’t worry if you missed the notification. In a ticket context, a message will be appended to the conversation so you have a clear history of what happened:

And that’s it! We hope you’ll find ways to benefit from this new feature in ways we did not imagine. That’s what it is all about.
Once you’ve had a chance to try it out, please let us know what you think by chatting us via the chat icon on the bottom right of the Gorgias web app or emailing us at [email protected].
Did you like this update?
![]()
![]()
![]()
Leave your name and email so that we can reply to you (both fields are optional):